
How to Connect an SSR Relay to an Arduino (Step-by-Step Guide)
To connect an SSR-40DA (Solid State Relay) to an Arduino, follow this safe and simple wiring and setup guide. The SSR-40DA is designed to control AC loads using a DC signal from the Arduino.

⚠️ IMPORTANT SAFETY NOTE:
The AC side of the SSR handles high voltage (110V or 220V AC). Take extreme caution and disconnect power before wiring. If unsure, consult a qualified electrician.
🧰 What You Need:
- SSR-40DA (DC to AC Solid State Relay)
- Arduino (Uno, Nano, etc.)
- AC load (e.g., lamp, motor)
- Jumper wires
- Resistor (optional: 330–1kΩ to limit input current)
- AC source (110V/220V, depending on your device)
- Relay heatsink (optional but recommended for high loads)
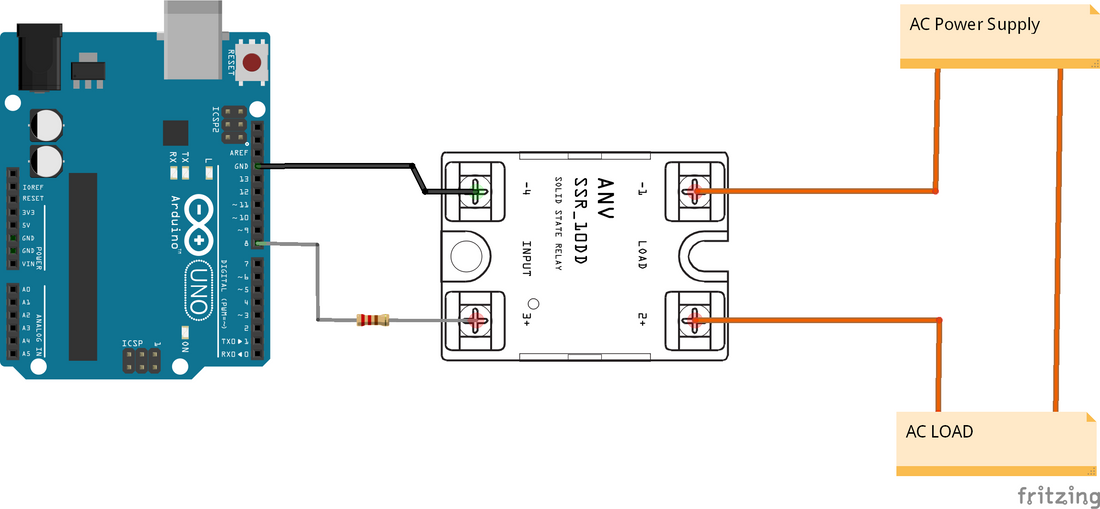
🧠 SSR-40DA Pin Layout:
-
Input Side (DC, from Arduino):
- + (positive) — Connects to 220R and Arduino digital pin (e.g., D8)
- – (negative) — Connects to Arduino GND
-
Output Side (AC load):
- 1 / Load In — AC live (L) wire from source
-
2 / Load Out — AC live (L) wire to the appliance
(AC neutral (N) wire goes directly to the appliance and power source)
🧯 Wiring Diagram:

✅ Arduino Example Code:
🧊 Notes:
- The SSR-40DA triggers with 3–32V DC, so a 5V signal from Arduino is safe.
- When activated, the SSR closes the circuit and lets AC flow to the load.
- A heatsink is highly recommended if you control loads above ~10A.
- SSRs do not click like mechanical relays — they switch silently.